暂无评论
# 第十七章 前端商品分类管理
在上一章节中,我们实现了精选主题的管理页面,本章节我们将实现商品分类管理的页面。在有了前面两章内容的知识铺垫,加上本身商品分类管理的逻辑是比较简单的,所以本章节可以说是比较轻松的一个章节,大家可以当作是复习巩固。
# 商品分类列表
首先我们要来实现的商品分类列表页面的展示,按照目录规范,我们在src/views下新增一个product文件夹,在该文件夹下接着新建一个category文件夹,最后在这个文件夹下面新增一个List.vue文件并添加如下代码:
<template>
    <div class="lin-container">
        <div class="lin-title">商品分类列表</div>
        <div class="button-container">
            <!-- 指定button类型 -->
            <el-button type="primary">新增分类</el-button>
        </div>
        <div class="table-container">
            <el-table></el-table>
        </div>
    </div>
</template>

<script>
export default {
  name: 'List',
}
</script>

<style lang="scss" scoped>
    .button-container{
        margin-top: 30px;
        padding-left: 30px;
    }

    .table-container{
        margin-top: 30px;
        padding-left: 30px;
        padding-right: 30px;
    }
</style>
1
2
3
4
5
6
7
8
9
10
11
12
13
14
15
16
17
18
19
20
21
22
23
24
25
26
27
28
29
30
31
32
2
3
4
5
6
7
8
9
10
11
12
13
14
15
16
17
18
19
20
21
22
23
24
25
26
27
28
29
30
31
32
页面文件定义好之后,我们同样是先让这个页面能够正常展示出来,在src\config\stage目录我们需要新增一个配置文件product.js,并加入如下代码:
const productRouter = {
  route: null,
  name: null,
  title: '商品管理',
  type: 'folder', // 类型: folder, tab, view
  icon: 'iconfont icon-tushuguanli', // 菜单图标
  filePath: 'views/product/', // 文件路径
  order: 3,
  inNav: true,
  children: [
    {
      title: '商品分类',
      type: 'view',
      route: '/product/category',
      filePath: 'views/product/category/List.vue',
      inNav: true,
      icon: 'iconfont icon-tushuguanli',
    },
  ],
}

export default productRouter
1
2
3
4
5
6
7
8
9
10
11
12
13
14
15
16
17
18
19
20
21
22
2
3
4
5
6
7
8
9
10
11
12
13
14
15
16
17
18
19
20
21
22
路由配置文件定义好之后,别忘了在src\config\stage\index.js中引入一下:
import adminConfig from './admin'
import bookConfig from './book' // 引入图书管理路由文件
import operationConfig from './operation' // 引入运营管理路由文件
import pluginsConfig from './plugins'
import Utils from '@/lin/utils/util'
// ------------------我是分割线------------------------
import productRouter from './product' // 引入商品管理路由文件

// eslint-disable-next-line import/no-mutable-exports
let homeRouter = [
  //   省略一堆代码
  ...............
  ...............
  productRouter  // 加载商品管理路由配置文件
]

  //   省略一堆代码

export default homeRouter
1
2
3
4
5
6
7
8
9
10
11
12
13
14
15
16
17
18
19
20
2
3
4
5
6
7
8
9
10
11
12
13
14
15
16
17
18
19
20
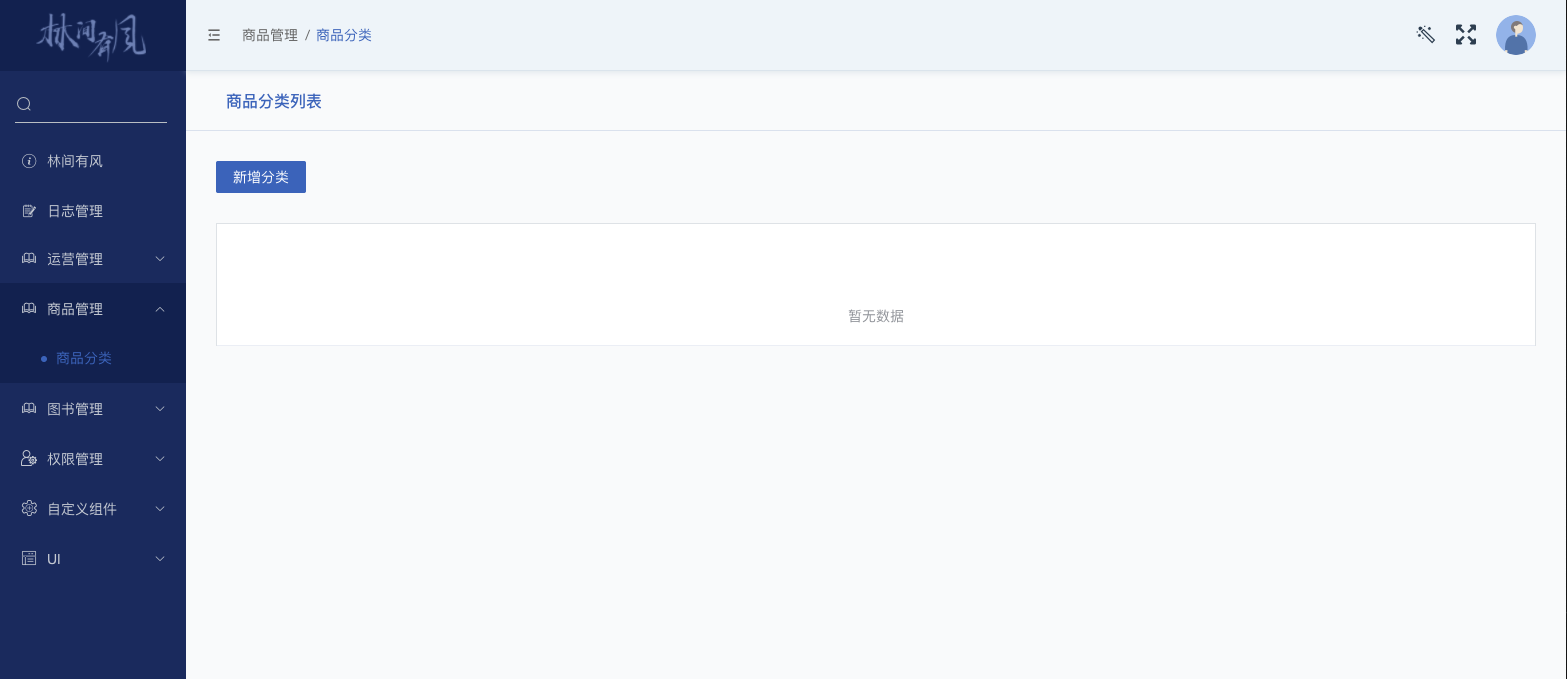
配置完毕之后,回到我们的浏览器中,刷新一下,可以看到我们左边的菜单栏中就多出了一个商品管理,展开后点击商品分类可以看到我们之前搭好的骨架代码效果:
接着我们就要实现页面能够发起请求从后端接口获取数据并填充到页面表格中。首先我们同样是需要先定义模型方法,在src/models目录下新建一个category.js并添加如下代码:
// src/models/catrogry.js

import { get } from '@/lin/plugins/axios'

class Category {

  async getCategory() {
    const res = await get('v1/category')
    return res
  }

}

export default new Category()
1
2
3
4
5
6
7
8
9
10
11
12
13
14
2
3
4
5
6
7
8
9
10
11
12
13
14
这里我们定义了一个模型类Catrogry,模型类下面有一个方法getCategory()用于调用后端相应的接口实现商品分类列表的查询,定义完毕之后,让我们回到List.vue中调用一下`:
<template>
    <div class="lin-container">
        <!-- 省略一堆代码 -->
        <div class="table-container">
            <el-table :data="tableData" v-loading="loading">
                <el-table-column type="index" width="80"></el-table-column>
                <el-table-column label="分类名称" prop="name"></el-table-column>
                <el-table-column label="分类描述" prop="description"></el-table-column>
                <!-- 操作列 -->
                <el-table-column label="操作" fixed="right" width="170">
                    <template slot-scope="scope">
                        <el-button type="primary" plain size="mini" @click="handleEdit(scope.row)">编辑</el-button>
                        <el-button type="danger" plain size="mini" @click="handleDelete(scope.row)">删除</el-button>
                    </template>
                </el-table-column>
            </el-table>
        </div>
    </div>
</template>

<script>
import categoryModel from '../../../models/category'

export default {
  name: 'List',
  data() {
    return {
      loading: false,
      tableData: [],
    }
  },
  created() {
    this.getCategory()
  },
  methods:{
    async getCategory() {
      let res
      try {
        this.loading = true
        this.tableData = await categoryModel.getCategory()
        this.loading = false
        this.tableData = [...res]
      } catch (e) {
        this.loading = false
      }
    },

    /** 编辑按钮点击事件 ...*/
    handleEdit(row){},

    /** 删除按钮点击事件 ...*/
    async handleDelete(row){}
  }
}
</script>

<style lang="scss" scoped>
   /* 省略一堆代码 */
</style>
1
2
3
4
5
6
7
8
9
10
11
12
13
14
15
16
17
18
19
20
21
22
23
24
25
26
27
28
29
30
31
32
33
34
35
36
37
38
39
40
41
42
43
44
45
46
47
48
49
50
51
52
53
54
55
56
57
58
59
2
3
4
5
6
7
8
9
10
11
12
13
14
15
16
17
18
19
20
21
22
23
24
25
26
27
28
29
30
31
32
33
34
35
36
37
38
39
40
41
42
43
44
45
46
47
48
49
50
51
52
53
54
55
56
57
58
59
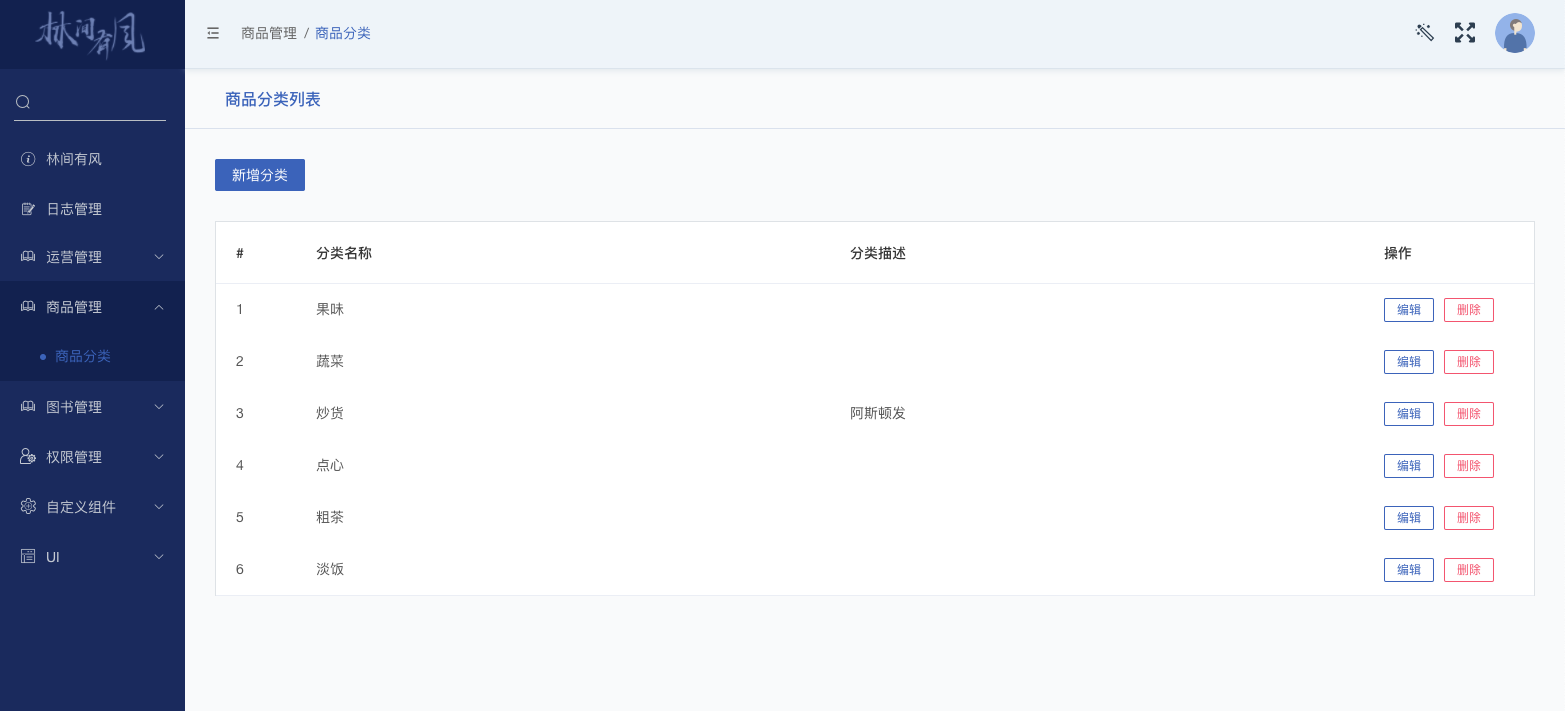
这里我们首先完善了<el-table>内的元素,定义了一些列,接着我们定义了一个组件方法getCategory(),这个方法里面会去调用我们刚刚定义好的模型类来实现获取数据。编辑按钮和删除按钮的点击事件回调方法我们暂时先定义一个空的函数即可,具体实现留待后面具体的小节中再来实现,这里只是为了防止编译报错。一切就绪之后,让我们回到浏览器中刷新一下,可以看到如下效果:
就是这么简单,以上就是本小节的内容,在下一小节,我们将来实现新增商品分类的页面,同样也是可以复用前面的知识点,不会有太大的难度,我们下小节再见!
# 新增商品分类
在上一小节中,我们实现了对商品分类列表的查询,在这一节,我们将来实现新增商品分类的功能。与精选主题或者轮播图管理不同的是,商品分类的新增页面表单元素没有那么多,逻辑也比较简单,所以这里我们不会像之前那样去做过多的封装实现,因为没有这个必要。这里我们选择的方式是在对话框中嵌入一个表单,通过这种交互来实现商品分类新增。实现方案确定了之后,我们在List.vue中,引入一个对话框组件,并且给新增分类的按钮添加一个点击事件handleAdd():
<!-- src/views/product/category/List.vue -->
<template>
    <div class="lin-container">
        <div class="lin-title">商品分类列表</div>
        <div class="button-container">
            <!-- 添加一个点击事件的回调方法  -->
            <el-button type="primary" @click="handleAdd">新增分类</el-button>
        </div>
        <div class="table-container">
          <!-- 省略一堆代码 -->
        </div>
        <!-- 引入对话框组件 -->
        <el-dialog :title="textMap[dialogStatus]" :visible.sync="dialogFormVisible" @close="resetForm('form')">
            这里是一个表单
            <div slot="footer" class="dialog-footer" style="padding-left:5px;">
                   <el-button @click="resetForm('form')">重 置</el-button>
                   <el-button type="primary" @click="confirm('form')">确 定</el-button>
            </div>
        </el-dialog>
    </div>
</template>

<script>
import categoryModel from '../../../models/category'

export default {
  name: 'List',
  data() {
    return {
      loading: false,
      tableData: [],
      // 是否显示对话框
      dialogFormVisible: false,
      // 对话框所属状态
      dialogStatus: '',
      // 根据状态显示对应对话框头部的文本信息
      textMap: {
        update: '编辑分类',
        create: '新增分类',
      },
    }
  },
  created() {
    this.getCategory()
  },
  methods:{
    async getCategory() {...},

    /**
     * 新增分类按钮点击事件
     */
    handleAdd() {
      this.dialogStatus = 'create'
      this.dialogFormVisible = true
      // 重置表单状态
      this.resetForm('form')
    },
    /** 对话框确认按钮点击事件 ...*/
    confirm(formName) {},

    /** 对话框重置按钮点击事件 ...*/
    resetForm(formName) {
      // TODO 重置表单状态
      // 通过配置对话框组件的@close事件监听,每次关闭对话框的时候也会触发这个方法
    },

    /** 编辑按钮点击事件 ...*/
    handleEdit(row){},

    /** 删除按钮点击事件 ...*/
    async handleDelete(row){}
  }
}
</script>

<style lang="scss" scoped>
   /* 省略一堆代码 */
</style>
1
2
3
4
5
6
7
8
9
10
11
12
13
14
15
16
17
18
19
20
21
22
23
24
25
26
27
28
29
30
31
32
33
34
35
36
37
38
39
40
41
42
43
44
45
46
47
48
49
50
51
52
53
54
55
56
57
58
59
60
61
62
63
64
65
66
67
68
69
70
71
72
73
74
75
76
77
78
2
3
4
5
6
7
8
9
10
11
12
13
14
15
16
17
18
19
20
21
22
23
24
25
26
27
28
29
30
31
32
33
34
35
36
37
38
39
40
41
42
43
44
45
46
47
48
49
50
51
52
53
54
55
56
57
58
59
60
61
62
63
64
65
66
67
68
69
70
71
72
73
74
75
76
77
78
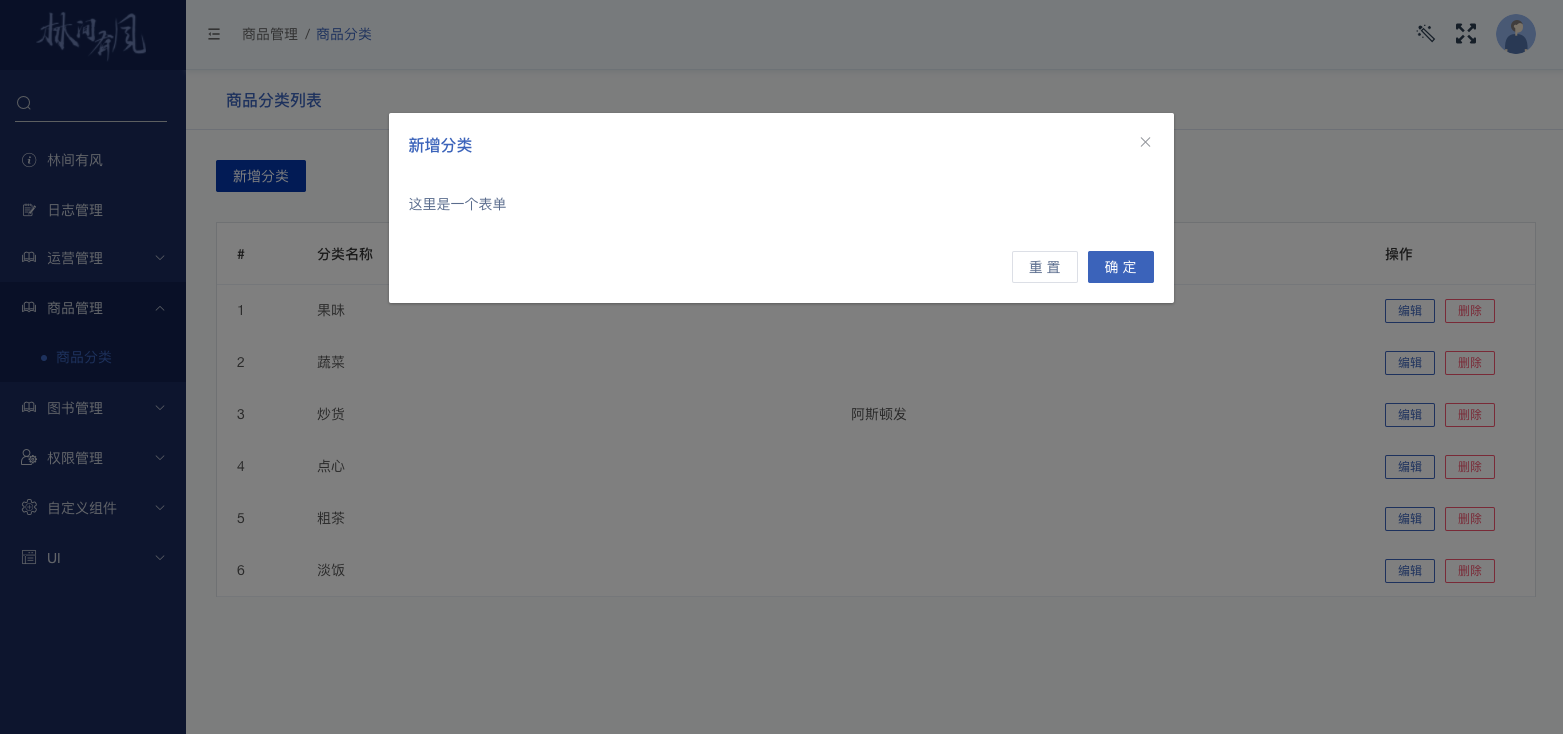
这里我们引入了一个对话框组件,并且在对话框组件内部添加了一些骨架代码,同时还定义了几个新的数据对象和3个回调方法,为方便测试,我们仅先简单实现了handleAdd()这个方法里的内容,主要就是打开一个对话框,并把对话框当前的状态标识为create,即代表本次打开是用于实现新增逻辑的,并且在每次打开一个新增分类的窗口时,我们会执行一次清空表单状态的操作。然后我们就可以先到浏览器中来看看效果:
这里我们已经实现了当点击新增分类的时候弹出一个对话框的效果,并且添加了一些基础代码和事件回调。现在我们就要来实现相应的具体逻辑来达到新增一个分类的目的。首先第一步当然就是在对话框里塞进去一个表单:
<!-- src/views/product/category/List.vue -->
<template>
    <div class="lin-container">
         <div class="lin-title">商品分类列表</div>
        <div class="button-container">
            <!-- 添加一个点击事件的回调方法  -->
            <el-button type="primary" @click="handleAdd">新增分类</el-button>
        </div>
        <div class="table-container">
          <!-- 省略一堆代码 -->
        </div>
        <!-- 引入对话框组件 -->
        <el-dialog :title="textMap[dialogStatus]" :visible.sync="dialogFormVisible" @close="handleClose">
            <el-form ref="form" :model="temp" status-icon label-width="100px"
                    @submit.native.prevent>
                <el-form-item label="名称" prop="name">
                    <el-input size="medium" v-model="temp.name" placeholder="分类名称"></el-input>
                </el-form-item>
                <el-form-item label="简介" prop="description">
                    <el-input
                            size="medium"
                            type="textarea"
                            :rows="4"
                            placeholder="分类简介"
                            v-model="temp.description">
                    </el-input>
                </el-form-item>
                <el-form-item label="分类图片" prop="img.id">
                    <upload-imgs ref="uploadEle" :max-num="1" :value="imgData" :remote-fuc="uploadImage"/>
                </el-form-item>
            </el-form>
            <div slot="footer" class="dialog-footer" style="padding-left:5px;">
                   <el-button @click="resetForm('form')">重 置</el-button>
                   <el-button type="primary" @click="confirm('form')">确 定</el-button>
            </div>
        </el-dialog>
    </div>
</template>

<script>
import categoryModel from '../../../models/category'
import UploadImgs from '@/components/base/upload-imgs',
import { customImageUpload } from '../../../lin/utils/file'

export default {
  name: 'List',
  components: { UploadImgs },
  data() {
    return {
      // 省略一堆代码
      temp: {
        id: null,
        name: '',
        description: '',
        img: {
          id: '',
          url: '',
        },
      },
      imgData: [],
      row: null,
      rules: {
        name: [
          {
            required: true,
            message: '请输入分类名称',
            trigger: 'blur',
          },
        ],
        description: [
          {
            required: true,
            message: '分类描述不能为空',
            trigger: 'blur',
          },
        ],
        'img.id': [
          {
            required: true,
            message: '分类图片不能为空',
            trigger: 'blur',
          },
        ],
      },
    }
  },
  methods:{

    // 省略一堆代码

    /**
     * 新增分类按钮点击事件
     */
    handleAdd() {
      this.dialogStatus = 'create'
      this.dialogFormVisible = true
      this.temp = {
        id: null,
        name: '',
        description: '',
        img: {
          id: '',
          url: '',
        },
      }
      this.resetForm('form')
    },

    /**
     * 对话框重置按钮点击事件
     */
    resetForm(formName) {
      this.imgData = this.dialogStatus === 'create' ? [] : [{
        imgId: this.row.img.id,
        display: this.row.img.url,
      }]
      // 使用this.$nextTick()可以等待dom生成以后再来获取dom对象
      this.$nextTick(() => {
        this.$refs[formName].resetFields()
      })
    },

    /**
     * 对话框确认按钮点击事件
     */
    async confirm(formName) {
      this.$refs[formName].validate(async (valid) => {
        if (valid) {
          try {
            if (this.dialogStatus === 'create') {
              const res = await categoryModel.createCategory(this.temp.name, this.temp.description, this.temp.img.id)
              this.$message.success(res.msg)
            } else {
              // TODO 编辑场景
            }
            this.dialogFormVisible = false
            await this.getCategory()
          } catch (e) {
            this.$message.error(Object.values(e.data.msg).join(';'))
          }
        }
      })
    },

    // 自定义图片上传组件上传方法
    async uploadImage(file) {
      const res = await customImageUpload(file)
      // 给表单对象属性赋值,因为分类封面图仅会有一张图片,这里直接取第一个元素
      this.temp.img = res[0]
      // 给图片上传组件赋值,因为分类封面图仅会有一张图片,这里直接取第一个元素
      return Promise.resolve({
        id: res[0].id,
        url: res[0].url,
      })
    },
  }
}
</script>

<style lang="scss" scoped>
   /* 省略一堆代码 */
</style>
1
2
3
4
5
6
7
8
9
10
11
12
13
14
15
16
17
18
19
20
21
22
23
24
25
26
27
28
29
30
31
32
33
34
35
36
37
38
39
40
41
42
43
44
45
46
47
48
49
50
51
52
53
54
55
56
57
58
59
60
61
62
63
64
65
66
67
68
69
70
71
72
73
74
75
76
77
78
79
80
81
82
83
84
85
86
87
88
89
90
91
92
93
94
95
96
97
98
99
100
101
102
103
104
105
106
107
108
109
110
111
112
113
114
115
116
117
118
119
120
121
122
123
124
125
126
127
128
129
130
131
132
133
134
135
136
137
138
139
140
141
142
143
144
145
146
147
148
149
150
151
152
153
154
155
156
157
158
159
160
161
162
首先我们往对话框组件里塞入了一个<el-form>组件,具体的内容在前面我们已经反复接触实战过了,就是定义几个表单项,添加一些配置而已。接着我们定义了几个新的数据对象,分别是对应表单数据的temp、代表当前选中行的数据row(编辑场景下重置表单状态的方法内会用到)、图片上传组件的数据对象imgData以及表单校验规则配置rules,这些都是很常规基础的配置。这里我们还需要完善一下前面定义的handleAdd()方法,我们还需要在每一次打开新增分类的窗口时,给对话框内的表单项做一个数据初始化的工作,保证每一次打开都是一个空的表单。相应的,
resetForm()方法里的具体逻辑我们也需要完善,这方法里面除了调用组件提供的resetFields()方法来重置表单状态以外,还需要对图片上传组件的内容做初始化。为了兼容后面的编辑商品分类场景,这里利用一个三元表达式:
this.imgData = this.dialogStatus === 'create'
      // 新增场景,默认是一个空数组
      ? []
      // 编辑场景,默认就是原来row记录里的数据
      : [{
        imgId: this.row.img.id,
        display: this.row.img.url,
      }]
1
2
3
4
5
6
7
8
2
3
4
5
6
7
8
来决定this.imgData这个数组应该被初始化成什么数据。接着我们实现了confirm()方法的具体业务逻辑,当点击对话框的“确定”按钮就会走到这里面的逻辑。这里面的逻辑也是非常简单的,就是在保证检验规则都通过的情况下,去调用相应的模型方法(这个套路在本专栏以及真实开发场景下都是很常用的基础套路),这里我们做了一个if判断,根据对话框的业务状态来决定是新增还是编辑,这里我们暂时先实现了新增相关的逻辑。在新增成功后,我们会调用一个消息通知组件给出一个新增成功的提示,并且关闭对话框然后再一次调用获取表格数据方法实现数据刷新。理清脉络之后,我们接下来自然是需要来实现一下这个模型方法,去到我们的Category模型类中,我们新增一个createCategory()模型方法:
// src/models/catrogry.js

import { get,post } from '@/lin/plugins/axios'

class Category {

  handleError = true


  async getCategory() {...}

  async createCategory(name, description, topicImgId){
    const res = await post('v1/category',
      { name, description,topic_img_id:topicImgId },
      { handleError: this.handleError })
    return res;
  }

}

export default new Category()
1
2
3
4
5
6
7
8
9
10
11
12
13
14
15
16
17
18
19
20
21
2
3
4
5
6
7
8
9
10
11
12
13
14
15
16
17
18
19
20
21
这里我们定义了一个createCategory()方法,方法里面就是发起一个POST请求去调用我们后端的新增商品分类接口,定义好模型方法之后,我们整个新增商品分类的代码实现就算完成了,但是别忘了我们刚刚还在List.vue中定义了一个自定义的图片上传方法,虽然内容也是基本操作,这里当做复习,也给大家讲解一下。我们再次回到List.vue中:
<!-- src/views/product/category/List.vue -->
<template>
    <!-- 省略一堆代码 -->
</template>

<script>
import categoryModel from '../../../models/category'
import UploadImgs from '@/components/base/upload-imgs',
import { customImageUpload } from '../../../lin/utils/file'

export default {
  name: 'List',
  components: { UploadImgs },
  data() {...},
  methods:{

    // 省略一堆代码

    /**
     * 对话框确认按钮点击事件
     */
    async confirm(formName) {...},

    // 自定义图片上传组件上传方法
    async uploadImage(file) {
      const res = await customImageUpload(file)
      // 给表单对象属性赋值,因为分类封面图仅会有一张图片,这里直接取第一个元素
      this.temp.img = res[0]
      // 给图片上传组件赋值,因为分类封面图仅会有一张图片,这里直接取第一个元素
      return Promise.resolve({
        id: res[0].id,
        url: res[0].url,
      })
    },
  }
}
</script>

<style lang="scss" scoped>
   /* 省略一堆代码 */
</style>
1
2
3
4
5
6
7
8
9
10
11
12
13
14
15
16
17
18
19
20
21
22
23
24
25
26
27
28
29
30
31
32
33
34
35
36
37
38
39
40
41
2
3
4
5
6
7
8
9
10
11
12
13
14
15
16
17
18
19
20
21
22
23
24
25
26
27
28
29
30
31
32
33
34
35
36
37
38
39
40
41
这里我们同样需要用到图片上传组件以及自定义图片上传的方法,有了前面章节的铺垫,这里我们只需要直接复用我们前面定义好的customImageUpload()方法即可自定义的图片上传。到这里,我们的新增商品分类功能就已经实现完毕了,大家可以自行到浏览器中测试一下效果。以上就是本小节的内容,在下一小节,我们就将来实现一下编辑商品分类功能。
# 编辑商品分类
在上一小节中,我们实现了新增商品分类,在本小节中我们就来实现下编辑商品分类。功能实现的思路就是当点击表格中某一行记录的编辑按钮时,能够弹出一个对话框,点击确定后实现保存数据的更改,思路很简单,很多代码也是复用上一小节的。首先我们先具体实现下编辑按钮的点击事件回调方法:
<!-- src/views/product/category/List.vue -->
<template>
    <!-- 省略一堆代码 -->
</template>

<script>
import categoryModel from '../../../models/category'
import UploadImgs from '@/components/base/upload-imgs',
import { customImageUpload } from '../../../lin/utils/file'

export default {
  name: 'List',
  components: { UploadImgs },
  data() {...},
  methods:{

    // 省略一堆代码

    /**
     * 编辑按钮点击事件
     * @param row
     */
    handleEdit(row) {
      // 将当前行记录的数据保存起来,用于重置表单的时候恢复图片上传组件的内容
      this.row = row
      // 将当前行的数据赋值到表单数据对象,用于初始化表单数据
      // 注意这里需要考虑深拷贝还是浅拷贝的问题
      // 如果直接使用this.temp = row(浅拷贝),会发现后面在修改数据的同时,表格的数据也会同步发生变化。
      this.temp = JSON.parse(JSON.stringify(row))
      // 初始化图片上传组件的图片内容
      this.imgData = [{
        imgId: row.img.id,
        display: row.img.url,
      }]

      this.dialogStatus = 'update'
      this.dialogFormVisible = true
    },
    /**
     * 对话框确认按钮点击事件
     */
    async confirm(formName) {...},

    // 省略一堆代码
  }
}
</script>

<style lang="scss" scoped>
   /* 省略一堆代码 */
</style>
1
2
3
4
5
6
7
8
9
10
11
12
13
14
15
16
17
18
19
20
21
22
23
24
25
26
27
28
29
30
31
32
33
34
35
36
37
38
39
40
41
42
43
44
45
46
47
48
49
50
51
2
3
4
5
6
7
8
9
10
11
12
13
14
15
16
17
18
19
20
21
22
23
24
25
26
27
28
29
30
31
32
33
34
35
36
37
38
39
40
41
42
43
44
45
46
47
48
49
50
51
前面我们定义了handleEdit()方法但是没有实现它的具体逻辑,现在就是时候派上用场了,方法内我们做的事情和新增的时候是差不多的,区别就是多了初始化表单数据和保存当前行记录数据。方法实现好之后,我们就可以到浏览器中来看看效果了,尝试点击表格中某行一行记录的编辑按钮:
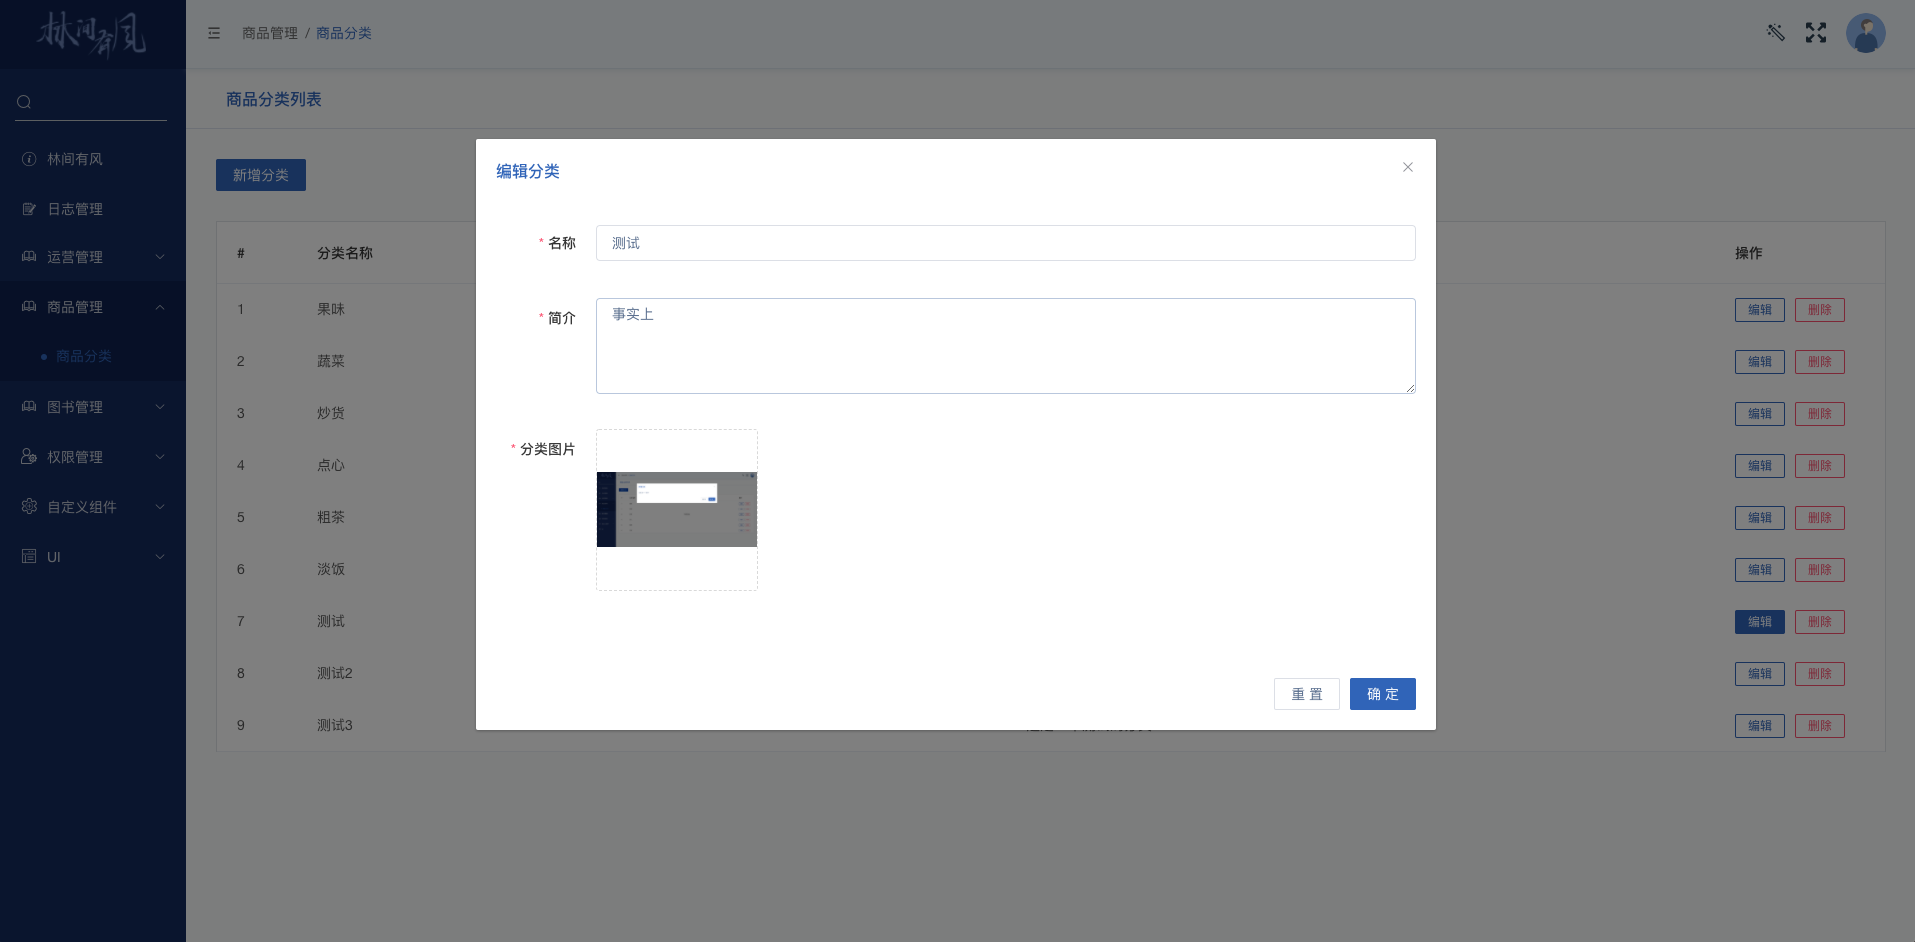
效果出来了,这里我们同样是会复用上一小节中所使用的对话框,只不过做了一些行为上的调整,每次会把行记录填充到表单中。同样的,当我们修改完数据之后,点击”确定“按钮,也是会进到我们前面定义的confirm()方法中。在上一小节中,我们只在方法中实现了关于新增分类的业务逻辑,这里我们就需要来补充完善编辑分类的业务逻辑了:
<!-- src/views/product/category/List.vue -->
<template>
    <!-- 省略一堆代码 -->
</template>

<script>
import categoryModel from '../../../models/category'
import UploadImgs from '@/components/base/upload-imgs',
import { customImageUpload } from '../../../lin/utils/file'

export default {
  name: 'List',
  components: { UploadImgs },
  data() {...},
  methods:{

    // 省略一堆代码

    /**
     * 编辑按钮点击事件
     * @param row
     */
    handleEdit(row) {...},
    /**
     * 对话框确认按钮点击事件
     */
    async confirm(formName) {
      this.$refs[formName].validate(async (valid) => {
        if (valid) {
          try {
            if (this.dialogStatus === 'create') {
              // 省略新增场景的业务逻辑代码
            } else {
              // TODO 编辑场景
              const res = await categoryModel.editCategory(this.temp.id,
                                                          this.temp.name,
                                                          this.temp.description,
                                                          this.temp.img.id)
              this.$message.success(res.msg)
            }
            this.dialogFormVisible = false
            await this.getCategory()
          } catch (e) {
            this.$message.error(Object.values(e.data.msg).join(';'))
          }
        }
      })
    },

    // 省略一堆代码
  }
}
</script>

<style lang="scss" scoped>
   /* 省略一堆代码 */
</style>
1
2
3
4
5
6
7
8
9
10
11
12
13
14
15
16
17
18
19
20
21
22
23
24
25
26
27
28
29
30
31
32
33
34
35
36
37
38
39
40
41
42
43
44
45
46
47
48
49
50
51
52
53
54
55
56
57
2
3
4
5
6
7
8
9
10
11
12
13
14
15
16
17
18
19
20
21
22
23
24
25
26
27
28
29
30
31
32
33
34
35
36
37
38
39
40
41
42
43
44
45
46
47
48
49
50
51
52
53
54
55
56
57
这里我们仅需要在Category模型类中新增一个编辑商品分类的方法然后调用即可,打开模型类文件并添加如下方法:
// src/models/catrogry.js

import { get,post,put } from '@/lin/plugins/axios'

class Category {

  handleError = true


  async getCategory() {...}

  async createCategory(name, description, topicImgId){...}

  async editCategory(id, name, description, topicImgId) {
    const res = await put(`v1/category/${id}`, {
      name,
      description,
      topic_img_id: topicImgId,
    }, { handleError: this.handleError })
    return res
  }
}

export default new Category()
1
2
3
4
5
6
7
8
9
10
11
12
13
14
15
16
17
18
19
20
21
22
23
24
2
3
4
5
6
7
8
9
10
11
12
13
14
15
16
17
18
19
20
21
22
23
24
这里我们在Category模型类中新增了一个editCategory()方法,方法内就是发起一个PUT类型的HTTP请求去调用后端编辑商品的接口,模型方法定义完毕之后,我们就可以到浏览器中测试一下效果了,各位读者可以自行到页面中点击某条商品分类记录的编辑按钮,尝试修改并确认提交验证下效果。
# 删除商品分类
在上一小节中,我们实现了编辑商品分类的页面功能,在这一小节,我们将实现商品管理的最后一个页面功能,即删除商品分类。功能实现的思路就是当点击表格中某一行记录的删除按钮时,实现记录的删除。
这里更标准的做法是同样需要先弹出一个对话框让用户确认是否删除,确认后再调用相应的接口。具体实现可以参考前面章节的内容,因为本身逻辑很简单也比较重复,这里为了节约篇幅,就只作一个简单的实现,读者可以自行根据需要去定制实现。
打开商品分类管理的List.vue,找到我们前面预先定义好的”删除“按钮点击事件回调方法,添加如下代码:
<!-- src/views/product/category/List.vue -->
<template>
    <!-- 省略一堆代码 -->
</template>

<script>
import categoryModel from '../../../models/category'
import UploadImgs from '@/components/base/upload-imgs',
import { customImageUpload } from '../../../lin/utils/file'

export default {
  name: 'List',
  components: { UploadImgs },
  data() {...},
  methods:{

    // 省略一堆代码

    /**
     * 删除按钮点击事件
     * @param row
     */
    async handleDelete(row) {
      this.loading = true
      try {
        const res = await categoryModel.delCategory([row.id])
        this.$message.success(res.msg)
        this.loading = false
        await this.getCategory()
      } catch (e) {
        this.loading = false
        this.$message.error(e.msg)
      }
    },
  }
}
</script>

<style lang="scss" scoped>
   /* 省略一堆代码 */
</style>
1
2
3
4
5
6
7
8
9
10
11
12
13
14
15
16
17
18
19
20
21
22
23
24
25
26
27
28
29
30
31
32
33
34
35
36
37
38
39
40
41
2
3
4
5
6
7
8
9
10
11
12
13
14
15
16
17
18
19
20
21
22
23
24
25
26
27
28
29
30
31
32
33
34
35
36
37
38
39
40
41
这里的实现比较简单,我们会在进入回调的时候改变一下表格的loading状态,让用户能够感知到正在删除。接着会去调用模型的方法实现接口调用来删除记录,成功后弹出一个消息通知并重新加载表格数据。接着我们就到模型类中来实现一下这个方法,打开Category模型类,我们新增一个方法:
// src/models/catrogry.js

import { get,post,put, _delete } from '@/lin/plugins/axios'

class Category {

  handleError = true


  async getCategory() {...}

  async createCategory(name, description, topicImgId){...}

  async editCategory(id, name, description, topicImgId) {...}

  async delCategory(ids) {
    const res = await _delete('v1/category', { ids })
    return res
  }
}

export default new Category()
1
2
3
4
5
6
7
8
9
10
11
12
13
14
15
16
17
18
19
20
21
22
2
3
4
5
6
7
8
9
10
11
12
13
14
15
16
17
18
19
20
21
22
模型方法定义完毕之后,我们就可以到浏览器中测试一下效果了,各位读者可以自行到页面中点击某条商品分类记录的删除按钮,尝试删除一条记录验证下效果。
# 章节回顾
在这个章节中,我们实现了前端部分商品分类管理的页面功能,如同一开始提到的一样,本章节的内容因为本身业务逻辑简单,加上有了前面两个比较复杂的章节内容铺垫,这个章节的内容实现起来可以说是没有什么难度的。其实很多时候我们在开发的时候经常会面临这种开发体验,特别是在做CMS类型的项目的时候,就是很纯粹的CURD。坦白说这个过程是比较枯燥,因为很多都是重复的操作。但是如果在时间允许的情况下,其实有时候我们可能再多点思考和尝试。比如说重复的地方我们是不是可以进行封装和抽象,这样以后在使用的时候可以更方便的调用。或者是在开发前端页面的时候,我们是不是可以在交互上做一些优化和改进,让用户在使用的时候用户体验更佳等等。这也是在重复工作中寻找乐趣或者突破的一种方式,特别是对于那些有一定工作经验但是感觉技术提升遇到瓶颈的同学,很容易在这个过程中找一些新的方向和领悟。本章节的内容就先到此为止了,读者们应该都觉得这章没什么难度,内容不多。是的,正如我们开头说的,这章会比较轻松,只是给大家喘口气缓一缓,权当复习。在下一个章节我们将进行商品库管理的页面模块开发,商品数据作为整个项目的核心基础数据,这部分的前端页面交互会比较复杂(可自行到线上demo体会),但复杂不等于困难,也不需要太担心。各位读者们做好准备就进入下一章的学习吧!
0/140
评论
0
- 上一页
- 首页
- 1
- 尾页
- 下一页
- 总共1页